
Settings
Custom fields
Add your own fields to transactions, customers and vendors, such as a project or sales rep.
In the app: Settings › Custom Fields
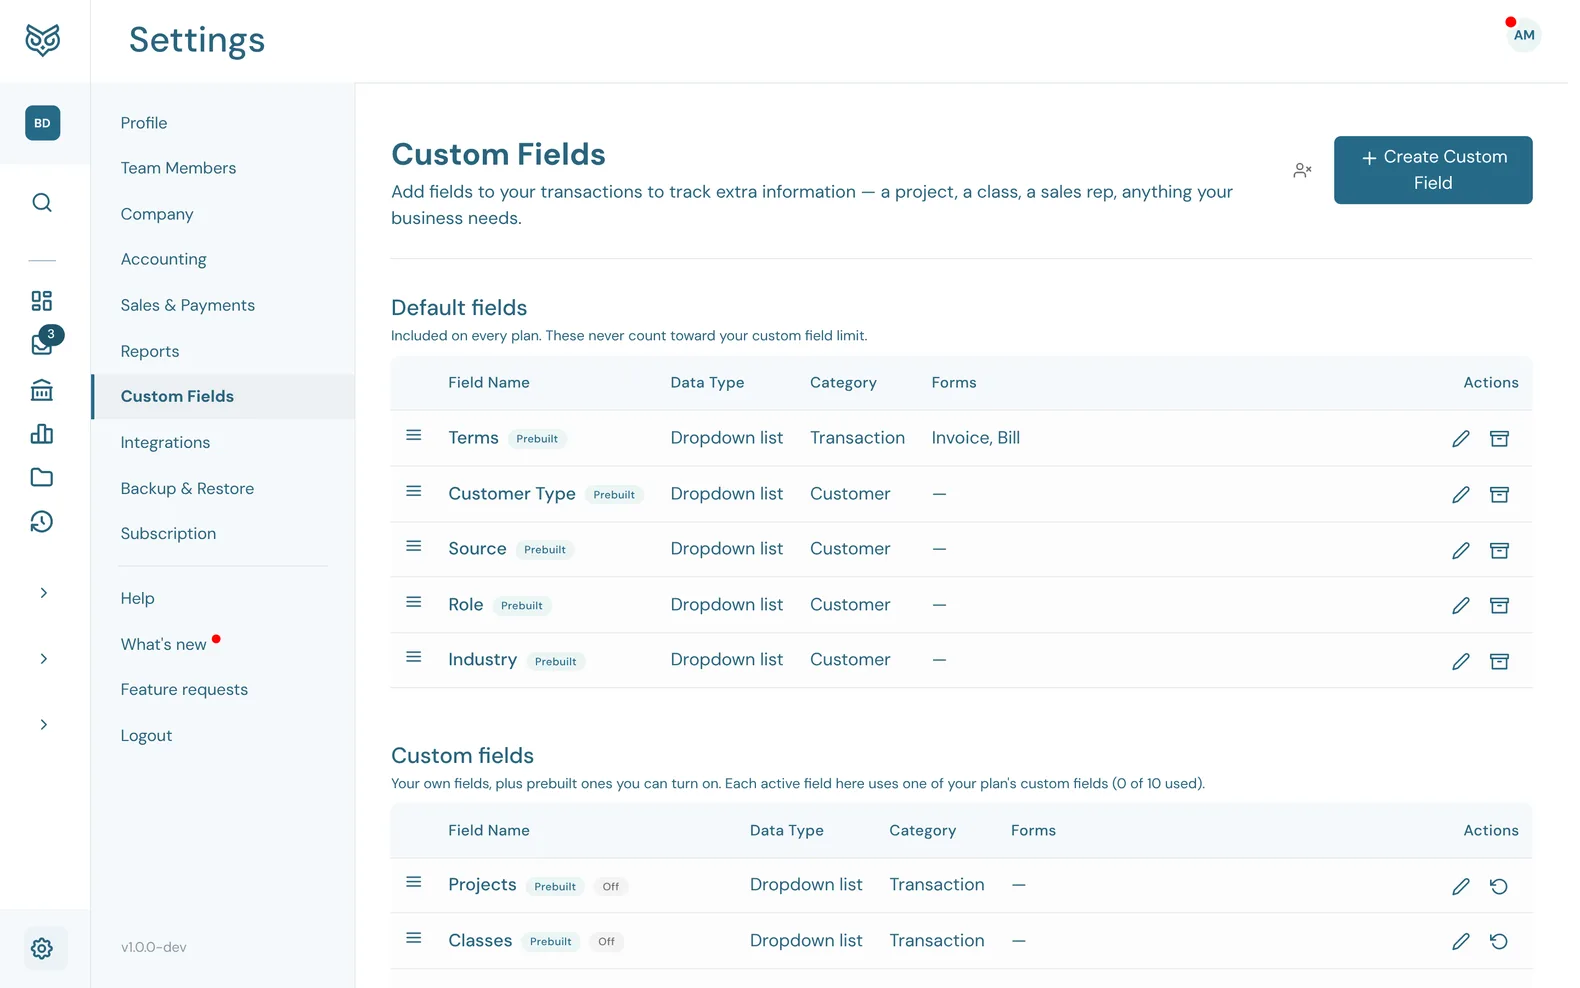
Custom fields track extra information on your forms: a project, a class, a sales rep, anything your business needs.
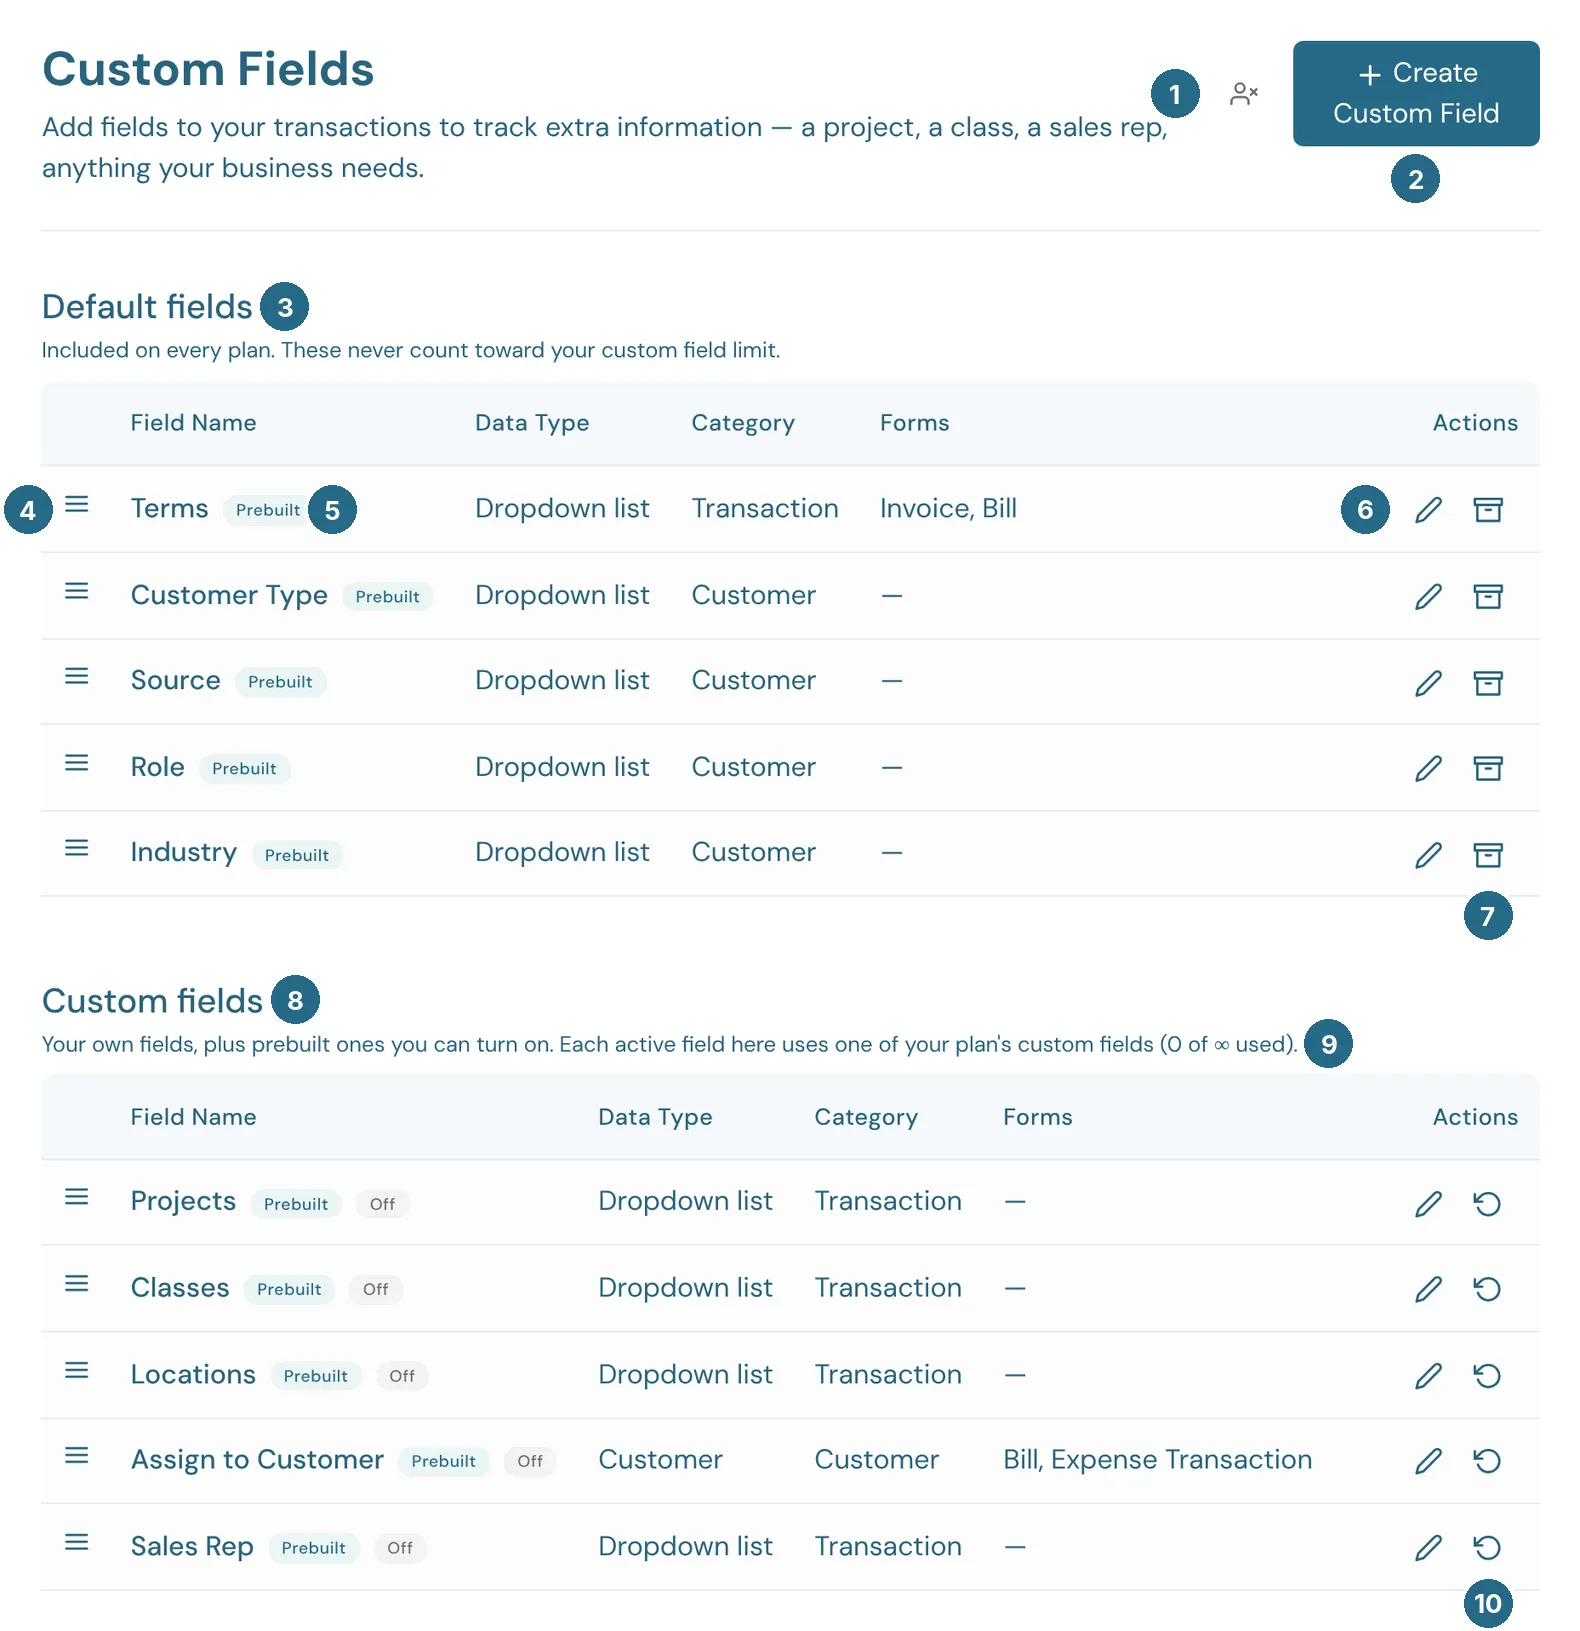
- Show inactive fields lists fields you've turned off as well.
- Create Custom Field adds your own (see below).
- Default fields: Terms, Customer Type, Source, Role and Industry. They're included on every plan and never count toward your limit.
- The handle: drag a field up or down to change its order.
- Prebuilt: a field WizeBooks provides, ready to use.
- Edit changes the field.
- Turn off takes a prebuilt field off your forms. On your own fields this reads Make inactive.
- Custom fields: your own fields, plus prebuilt ones you can switch on: Projects, Classes, Locations, Assign to Customer and Sales Rep.
- How many of your plan's custom fields you've used. Each active field here uses one: Starter includes 1, Pro 10 and Enterprise unlimited.
- Turn on switches a prebuilt field on. On your own fields this reads Make active.
Field Name, Data Type, Category and Forms show what each field is and where it appears.
Creating a field
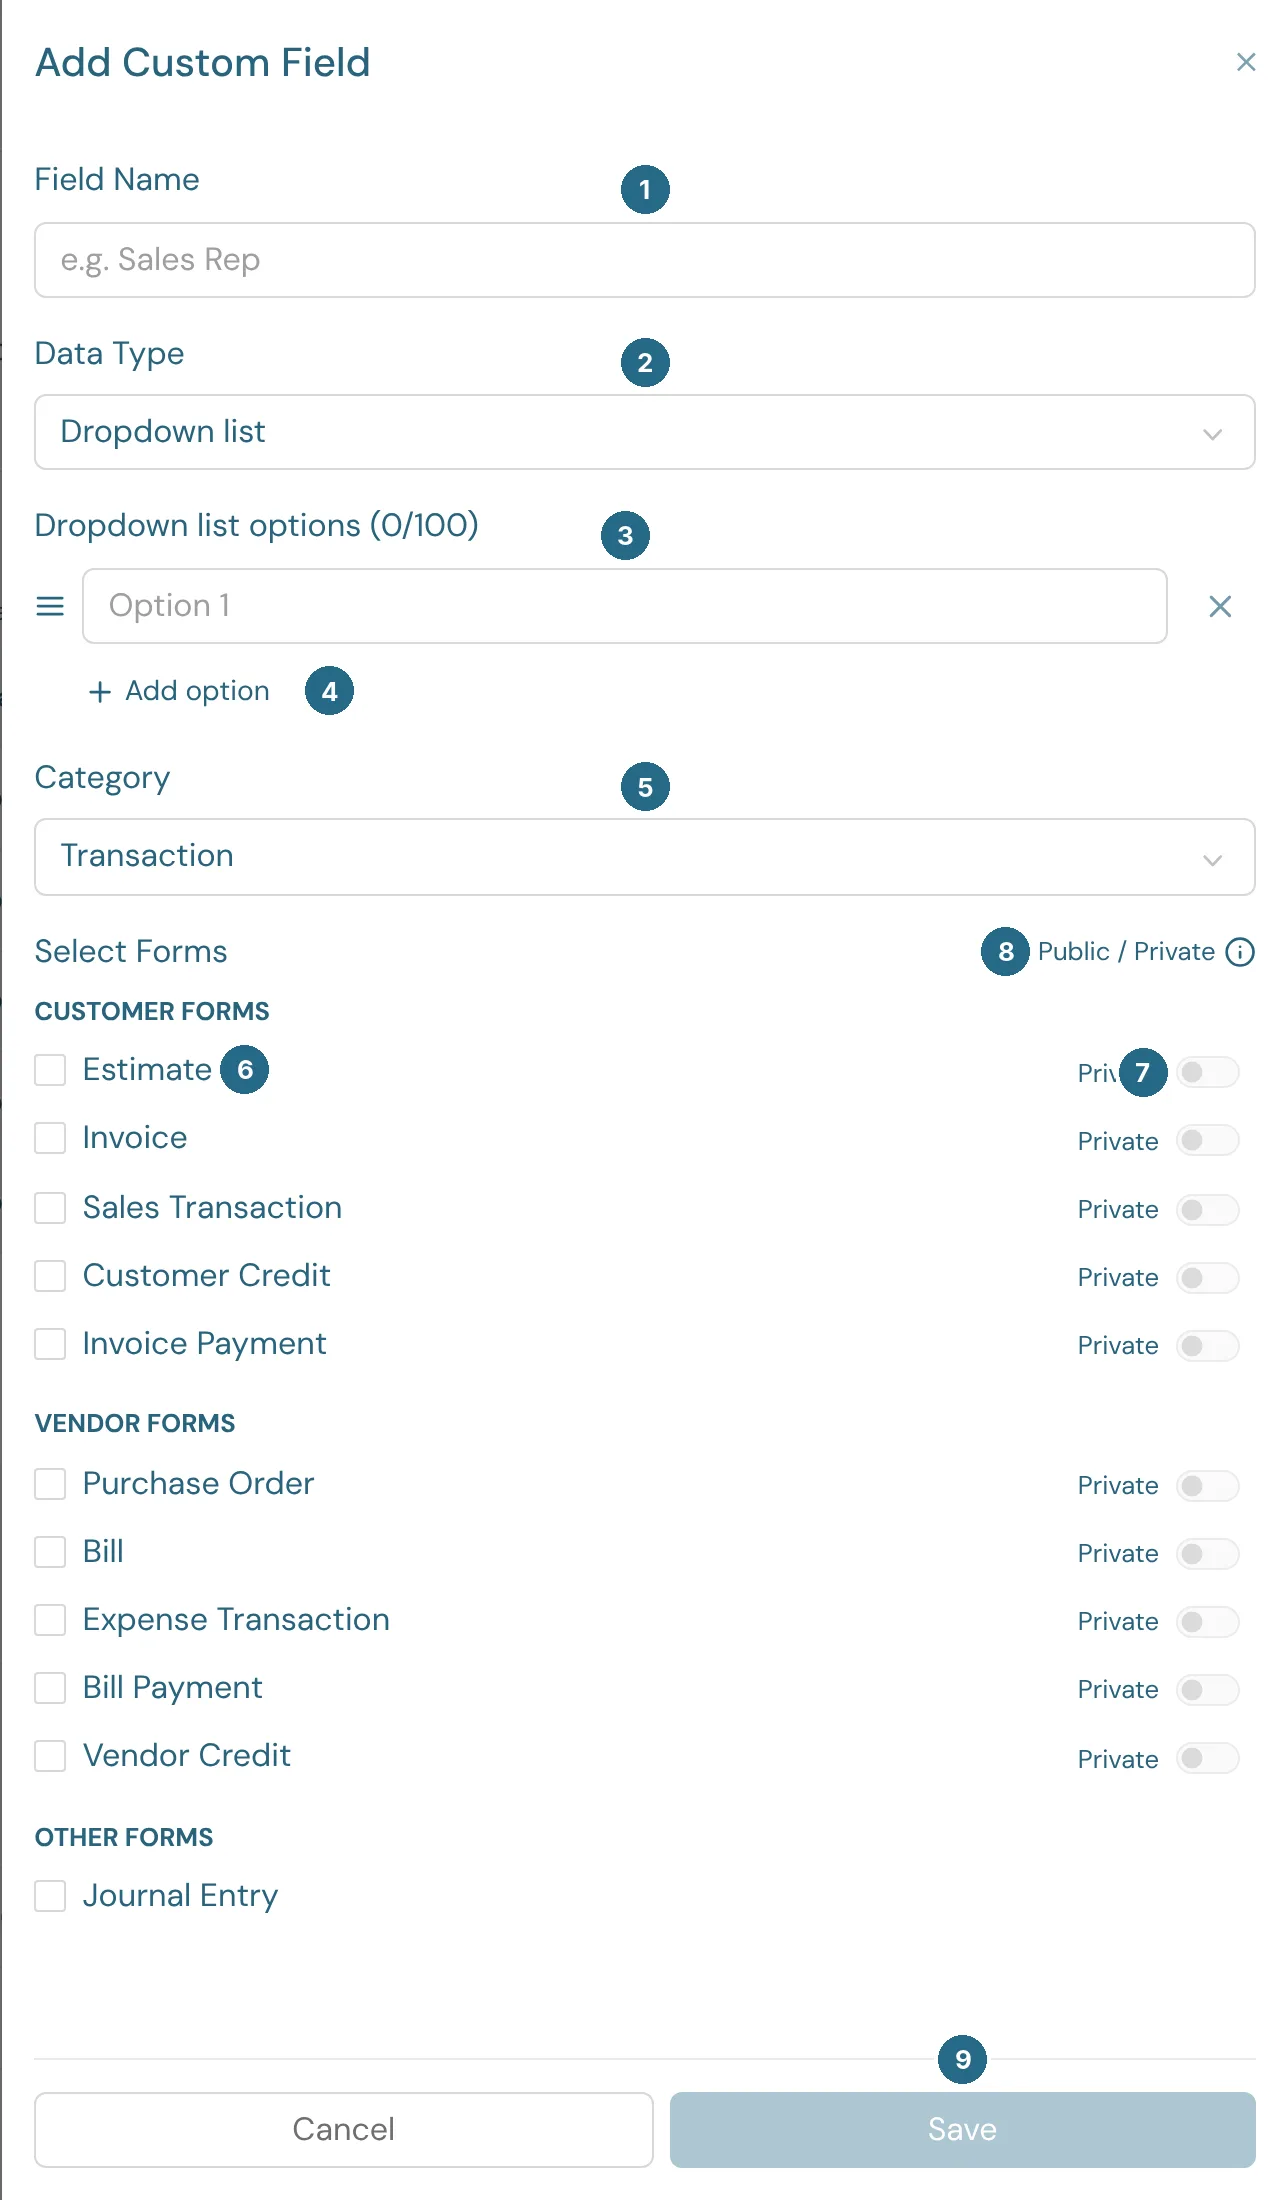
- Field Name, such as Sales Rep.
- Data Type: Dropdown list, Alphanumeric, Number or Date.
- Dropdown list options: the choices, up to 100.
- Add option adds another choice.
- Category: Transaction, Customer or Vendor.
- Select Forms: tick each form that should show the field, from estimates and invoices to bills, expenses and journal entries.
- Public or Private for each form: public prints on the form the customer or vendor sees, private is for your team only.
- Public / Private: hover over the icon for what each means.
- Save creates the field.
Line-level fields such as Classes and Locations can also be set in bulk with Reclassify.
Updated in v1.0.0