
Vendors
Everyone you buy from, with what you owe them, and each vendor's own page.
In the app: Purchases › Vendors
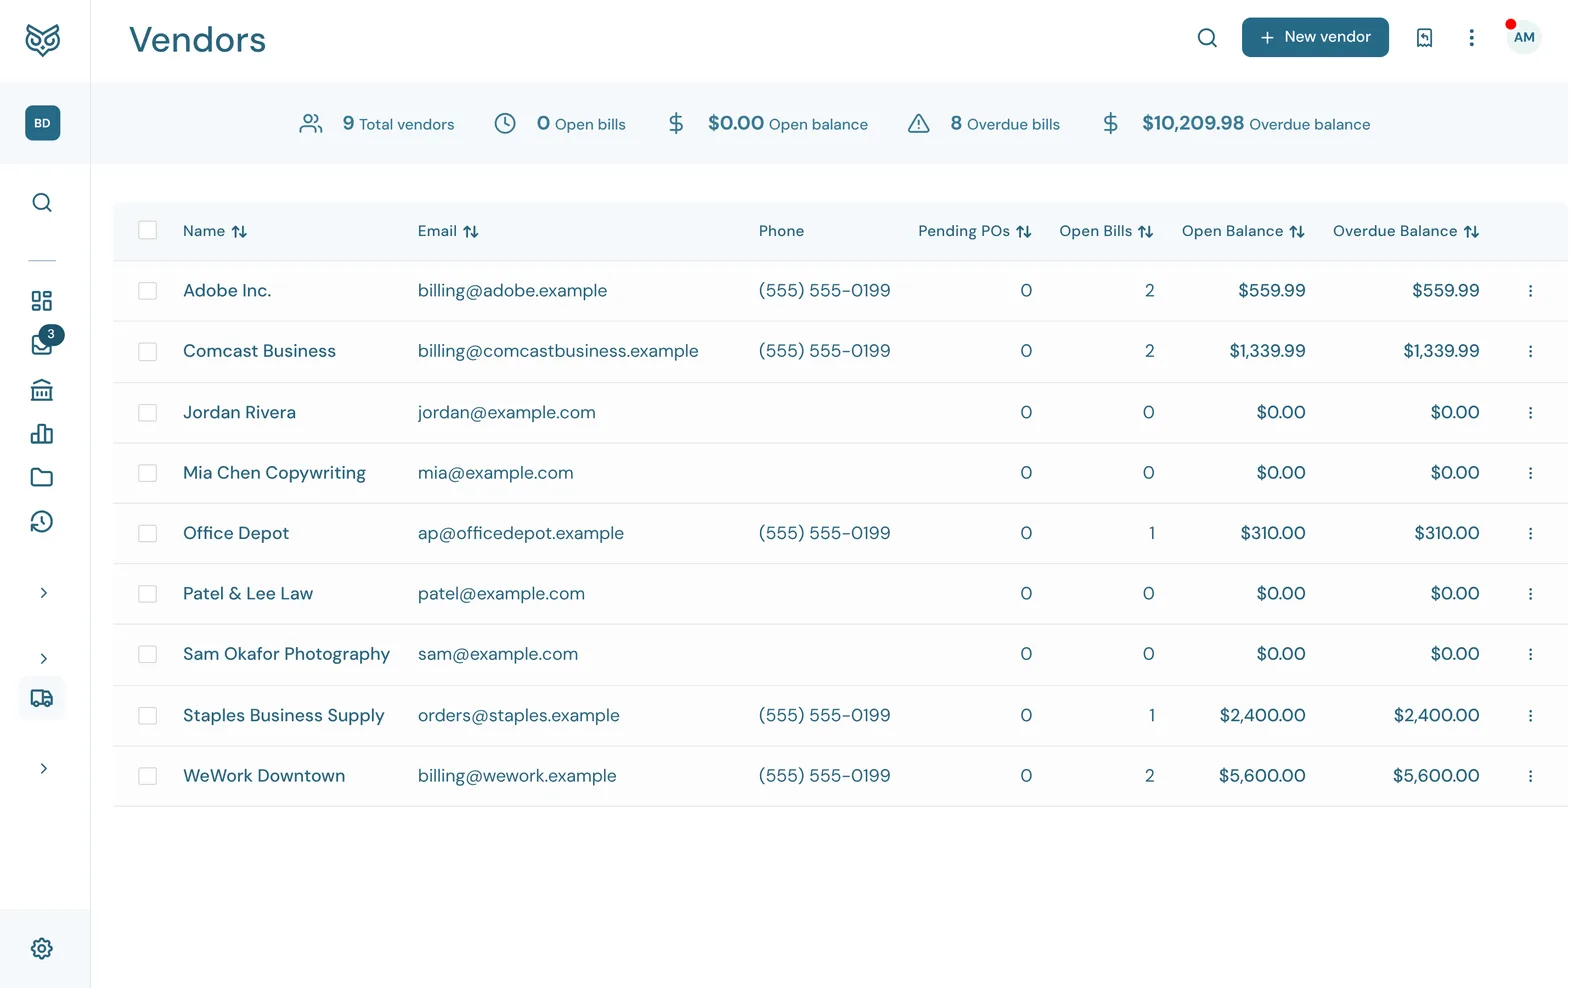
The Vendors list shows every vendor with what you owe them. Click a vendor's row to open their own page.
The top of the page

- Search filters the list as you type.
- New vendor adds one (see Adding a vendor). Its menu also has Import vendors (see Importing vendors).
- Vendor Credit (receipt icon) opens the list of credits vendors owe you. It isn't in the menu; see Vendor credit.
- More options: print or export the list, show inactive vendors, show or hide the stat band, and choose columns, page size and row height.
- The stat band: Total vendors, Open bills and Open balance (bills not yet due), and Overdue bills and Overdue balance (bills past their due date).
The list
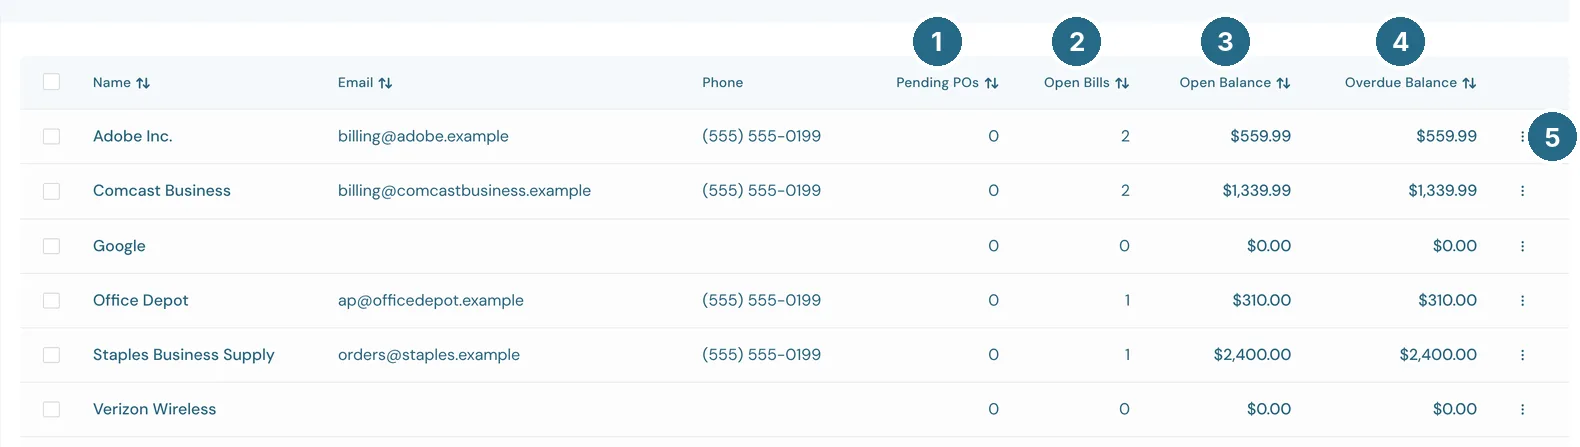
- Pending POs: purchase orders not yet turned into bills.
- Open Bills: how many of their bills still have money owing, overdue ones included.
- Open Balance: everything you still owe them, overdue included.
- Overdue Balance: the part of that past its due date.
- The row's ⋮ menu (below).
Name, Email and Phone fill in the rest. Tick rows to make several vendors inactive at once with Batch actions, and hover a row to copy its email address, as on the Customers list.
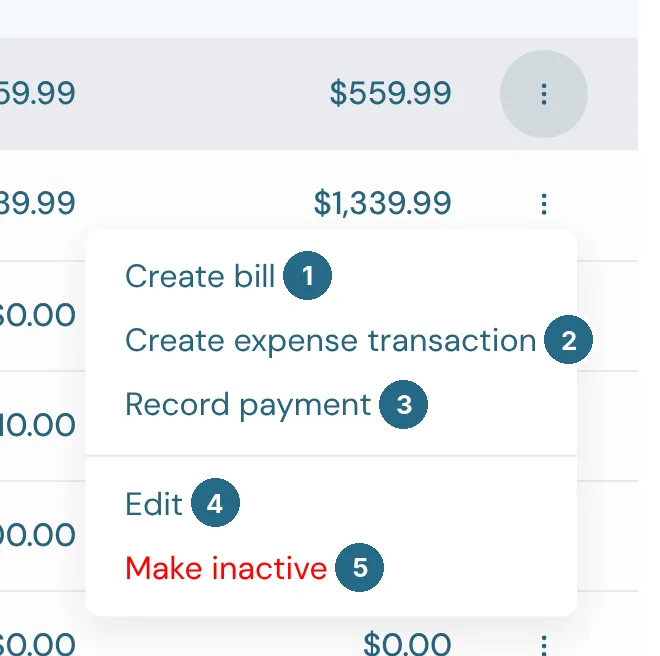
- Create bill opens a new bill for this vendor.
- Create expense transaction opens a new expense for them, for something already paid.
- Record payment, when you owe them money, asks which bill and then records a payment you made, such as a check.
- Edit opens their details in the vendor form.
- Make inactive hides the vendor from lists and pickers. Their history stays. Bring them back with More options › Show inactive, then Make active from the row menu.
Adding a vendor
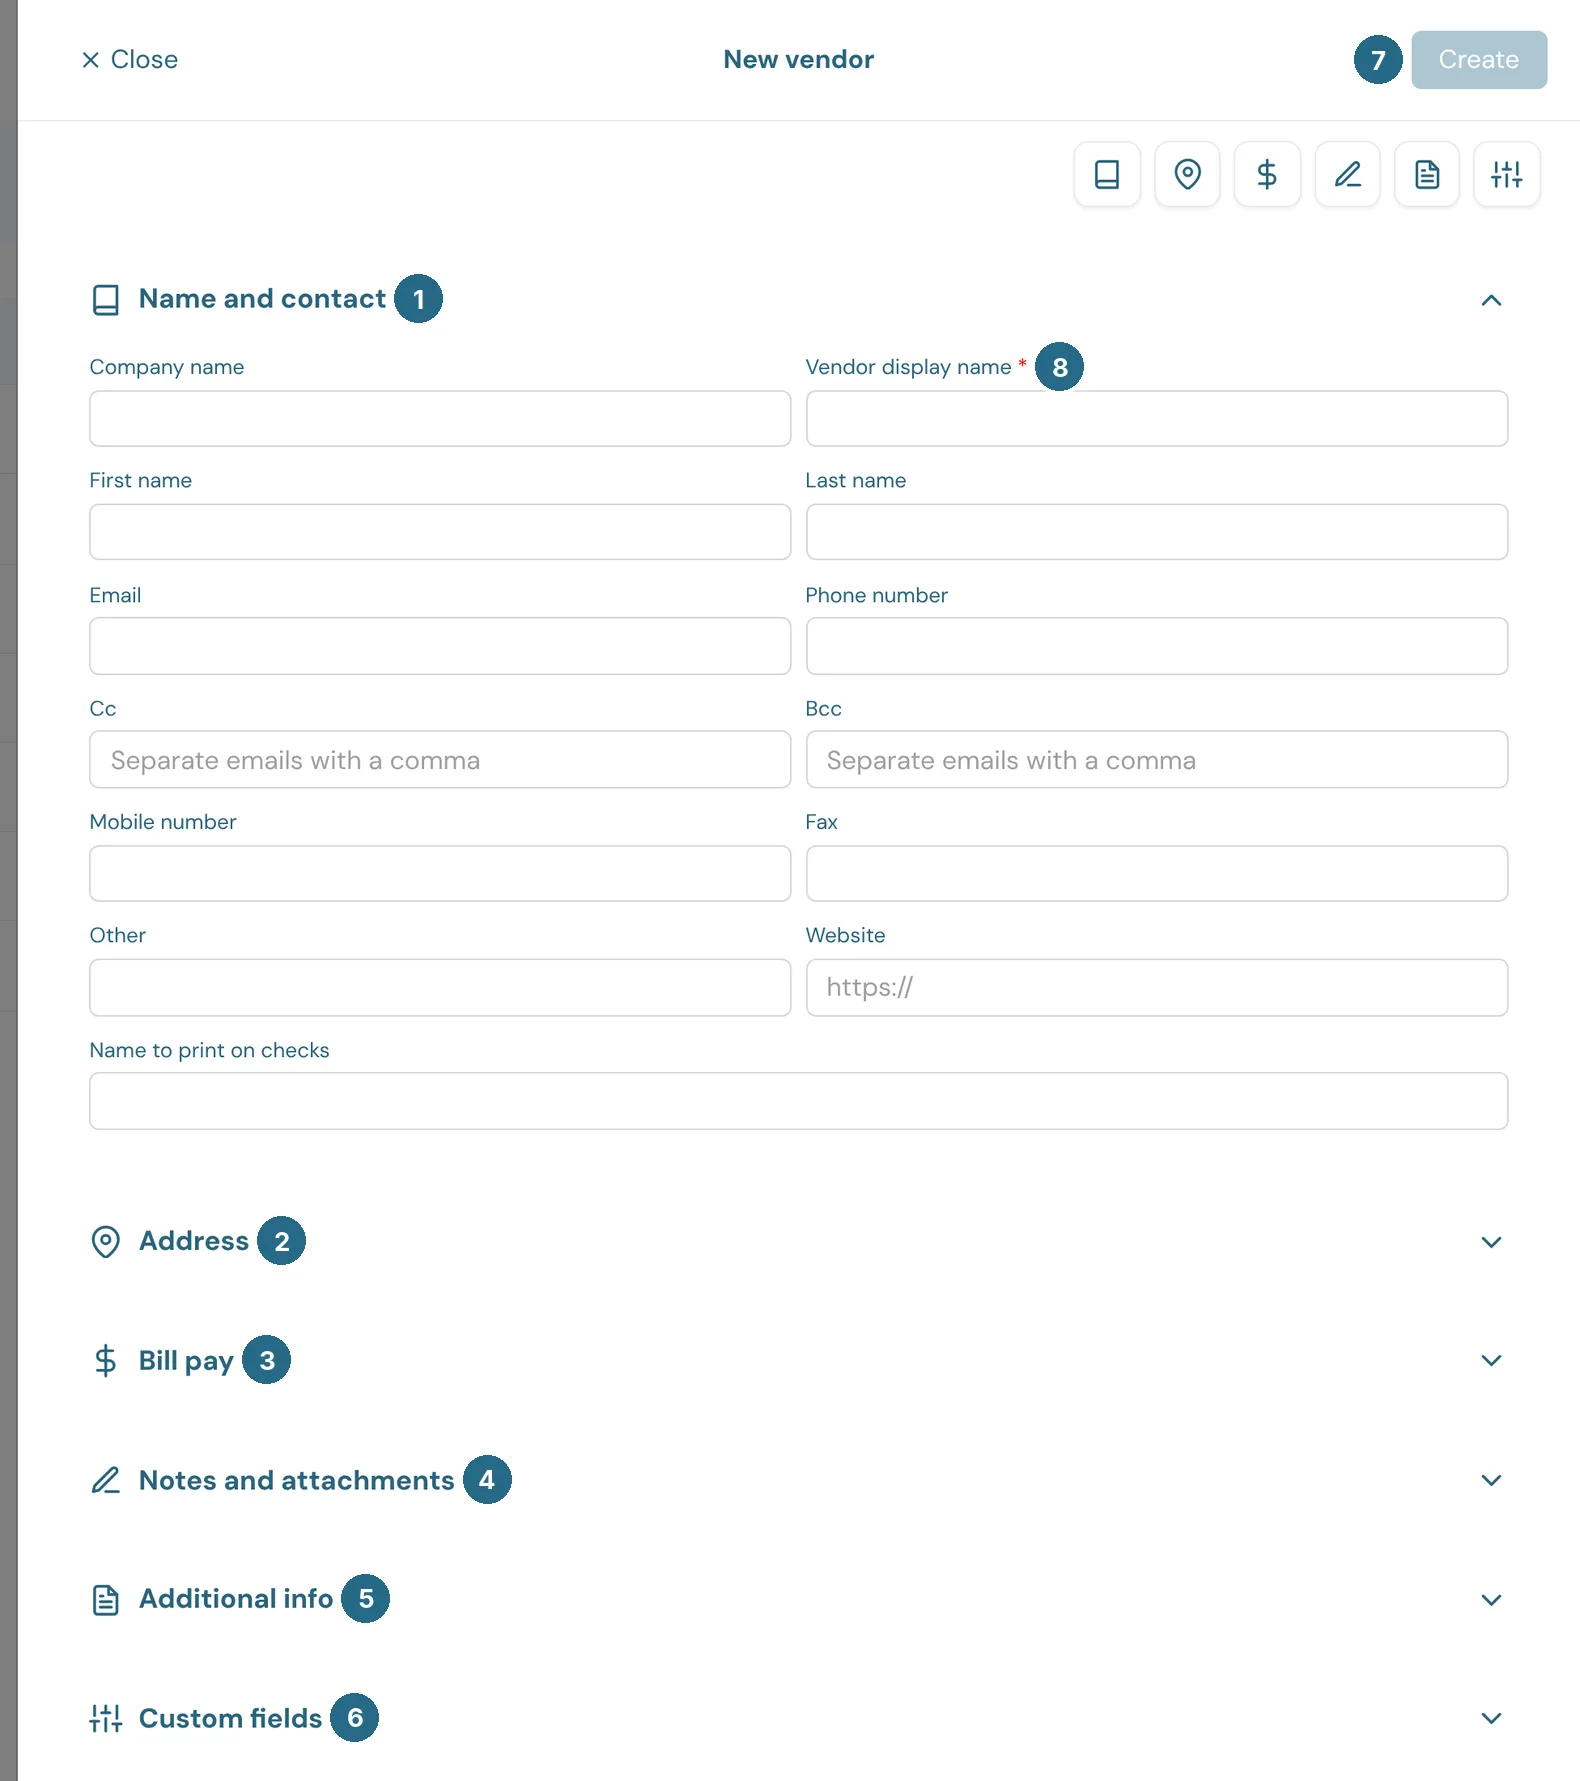
The form is split into folding sections. The icons along the top jump to each one.
- Name and contact: company name, first and last name, email, phone, Cc and Bcc addresses, mobile, fax, other, website and the Name to print on checks.
- Address: the billing address, and a shipping address that's the same as billing unless you untick it.
- Bill pay: paying vendors by ACH from WizeBooks is coming soon.
- Tax info and 1099: their tax ID, Track payments for 1099, and their W-9 (see Tax info and W-9s).
- Notes and attachments: private notes and files.
- Additional info (below).
- Custom fields: any vendor fields you've set up. + Add custom field creates one (see Custom fields).
- Create saves the vendor. It's greyed out until there's a name.
- Vendor display name is the only field you must fill in. It's the name shown on lists, bills and reports.
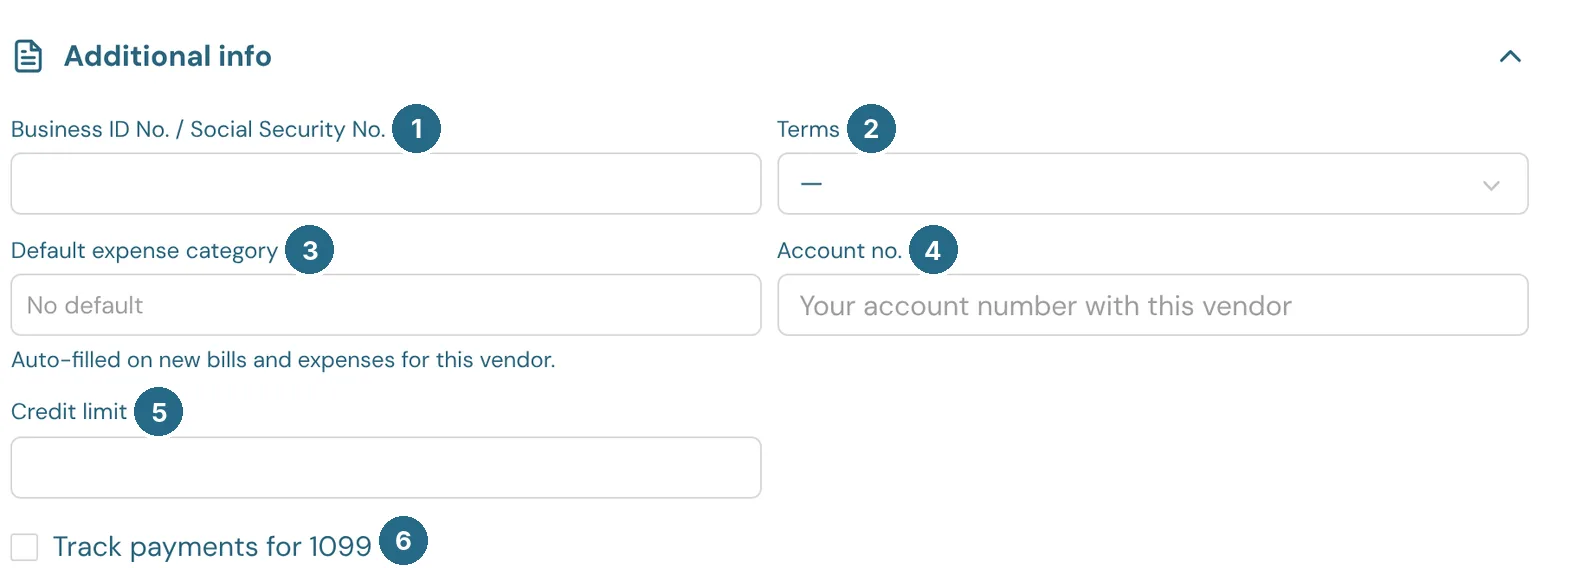
- Terms: Due on receipt, Net 15, Net 30 or Net 60. New bills from them get this due date.
- Default expense category: filled in on new bills and expenses for this vendor, so you don't pick it each time.
- Account no.: your account number with them.
- Credit limit: what they'll let you owe them.
Tax info and W-9s
The Tax info and 1099 section holds what you need at 1099 time.
- Business ID No. / Social Security No.: the vendor's tax ID. WizeBooks stores it encrypted and shows only the last four digits, such as •••-••-1234. An owner or admin can click Reveal to see the whole number, and each reveal is recorded in Activity. Change replaces it and Remove clears it.
- Track payments for 1099: marks a vendor you'll file a 1099 for. Their year's totals show on the 1099s page.
- Request W-9 emails the vendor a secure link to send their Form W-9. They can fill it in online and sign it by typing their name, or upload a W-9 they've already signed, which WizeBooks reads for them to check. The link works once and expires after 14 days. While a request is out, the button reads Resend request, and the line under it shows when it was sent, opened and reminded.
When the W-9 comes back:
- The W-9 is saved in Documents, in a W-9s folder, tagged W-9 and attached to the vendor. View W-9 opens it.
- A blank tax ID or billing address on the vendor is filled in from it. A tax ID brought over from QuickBooks with only its last four digits counts as blank.
- Track payments for 1099 follows the tax classification on the W-9: on for individuals, sole proprietors and partnerships, off for corporations. Corporations usually don't get a 1099, but attorneys and medical providers do, so tick it back on for those.
- If the W-9's tax ID or address is different from what's already on the vendor, nothing is overwritten. The section shows W-9 differs from profile with both versions. Use W-9 values updates the vendor; Keep profile leaves it as it was.
If the vendor doesn't answer, WizeBooks reminds them 3 and 7 days after the request. Turn that off with W-9 reminders to vendors in an owner's or admin's Profile notifications.
A vendor's page
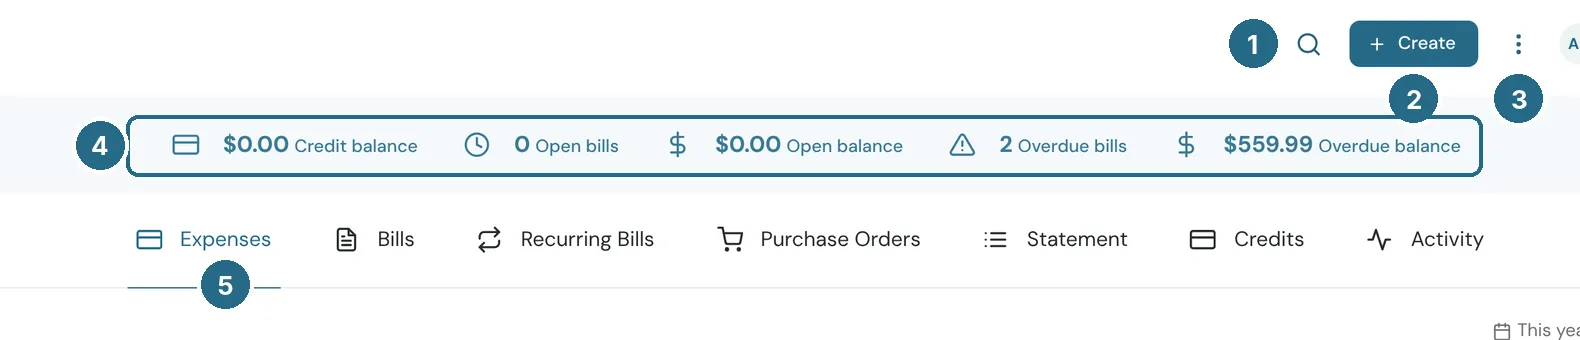
- Search looks within the open tab.
- Create starts something for this vendor (below).
- More options sets the open tab's columns, page size and row height.
- The stat band: this vendor's Credit balance (credit they owe you), Open bills, Open balance, Overdue bills and Overdue balance.
- The tabs. Expenses lists what you've paid them, Bills, Recurring Bills, Purchase Orders and Credits list their own documents, Statement is their account statement, and Activity shows every change to this vendor and their transactions.
‹ Vendors, at the top left, goes back to the list.
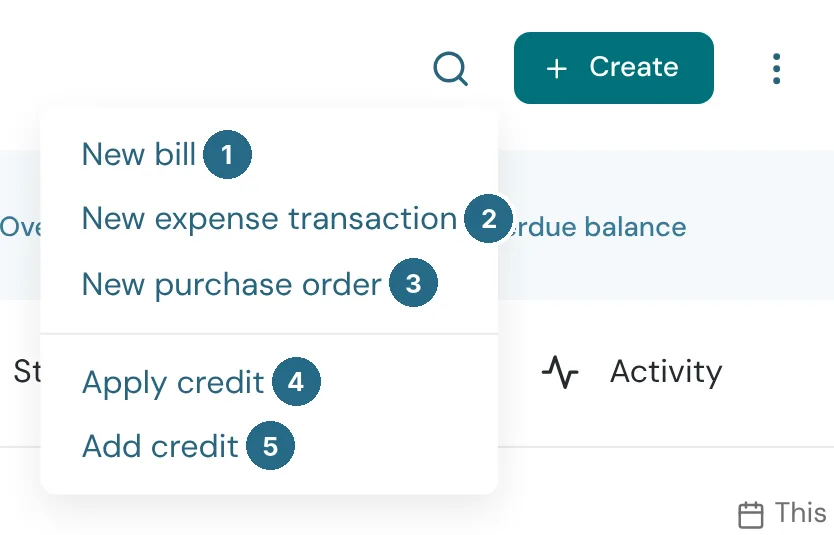
- New bill, already filled in with this vendor.
- New expense transaction, for something already paid.
- New purchase order.
- Apply credit uses credit they owe you against one of their open bills. You choose the bill.
- Add credit enters a new vendor credit from them.
The profile column
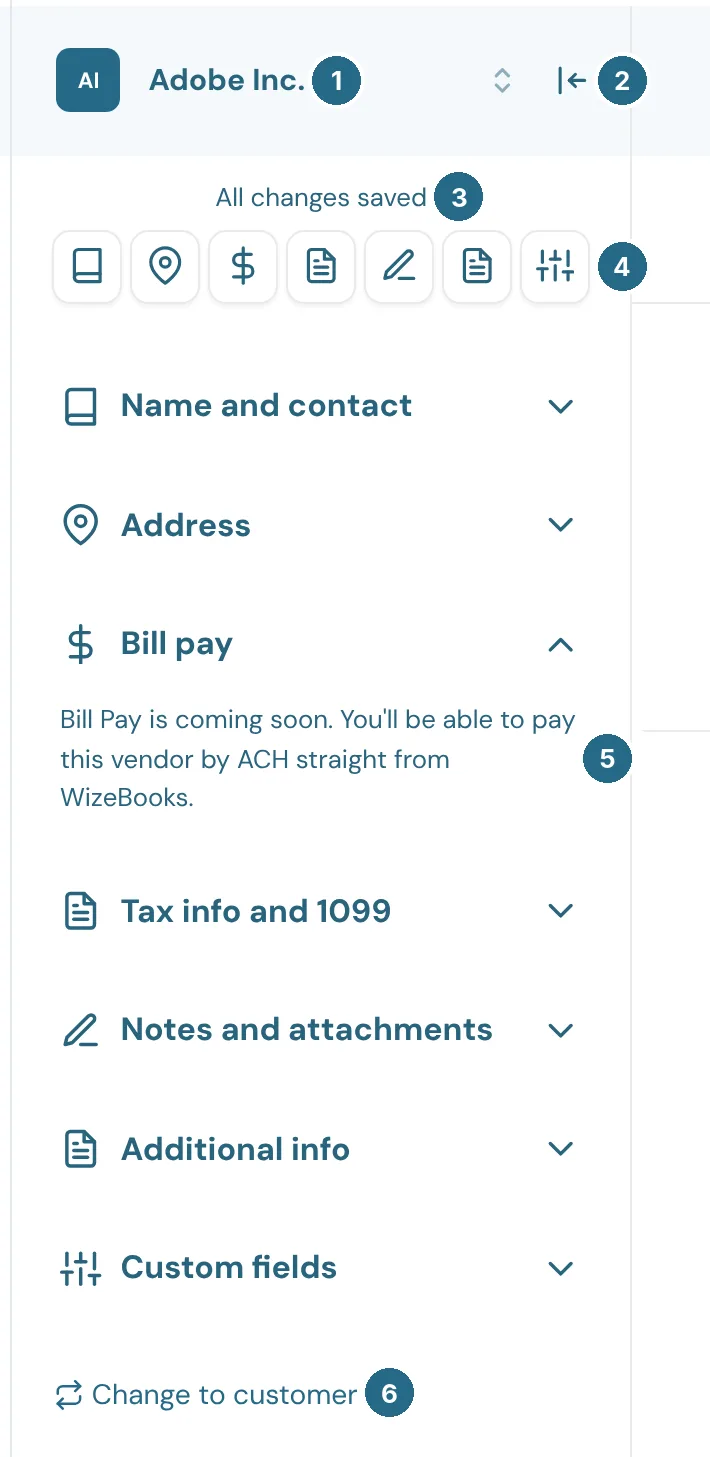
- Switch vendor: click the name to jump to another vendor's page.
- Fold narrows the column to a thin rail to give the tabs more room.
- All changes saved: the column has the same sections as the New vendor form, and saves as you type.
- The section icons jump to each section.
- Bill pay: paying this vendor by ACH straight from WizeBooks is coming soon.
- Change to customer is for a contact set up as the wrong kind. Their expenses come along. If they already have bills, purchase orders or credits, WizeBooks says what's in the way and offers to make a matching customer instead.
The tabs work like a customer's: see A customer's page.
Importing vendors
Choose New vendor › Import vendors and drop in a CSV or Excel (.xlsx) file with one vendor per row and a header row on top. Download a sample file gives you one to fill in.
- Name is the only column you need. Company, First name, Last name, Email, Phone, Mobile, Website, Terms, the address and Track 1099 (Yes or No) are read too.
- A vendor whose name is already in WizeBooks is skipped, never changed.
- When it's done you see how many were added, and each row that was skipped or couldn't be added, with the reason.
Up to 2,000 rows at a time. It works the same as importing customers.
Updated in v1.0.0